Showing posts with label blogger tricks. Show all posts

Hide or Remove Blogger Attribution Gadget - 2 Methods

By

Remove Blogger Attribution GadgetThere are two standard ways to remove Blogger Attribution Gadget. The First one uses simple CSS to hide the text "Powered by Blogger", the second recommended method simply deletes the Attribution Gadget from your BlogSpot layout. We will discuss both in detail today.

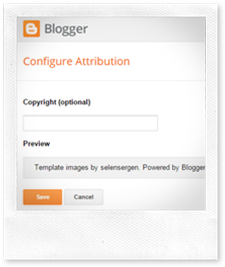
If you are new to Attribution Gadget, then it is the widget that blogger adds to your layout by default when you setup your blog. You can display your copyrights or credit links here. Unlike other widgets this gadget is locked by default and it has no "Remove" button that could help you remove the gadget from your layout.

1. Hide "Powered by Blogger" Attribution Gadget

Follow these steps to hide the attribution widget using CSS "display:none" property.

  1. Go To Blogger > Template
  2. Backup your Template
  3. Click Edit HTML
  4. Search for this code ]]></b:skin>
  5. Paste the following code above ]]></b:skin>

    #Attribution1{height:0;visibility:hidden;display:none}

  6. Save your template and you are done!

You have successfully hide the blogspot attribution credit link from your blog footer. The browser will not display or show the attribution or credit links attached to your layout but the gadget DOM will still load in background.
Blogger Attribution Gadget

2. Remove 'Powered by Blogger' Attribution From Template

To permanently remove or delete the attribution gadget from your template so that it may neither load nor display on your blogspot blog, then follow the steps below:

  1. Go To Blogger > Template
  2. Backup your Template
  3. Click Edit HTML
  4. From the "Jump to widget" section click on "Attribution1"

    Blogspot Attribution Gadget

  5. Delete the entire widget code that looks similar to the one shown in the image below, starting from <b:widget> and ending at </b:widget>:

    blogger Attribution widget

    If you expand the code, it looks similar to this one:

    <b:widget id='Attribution1' locked='true' title='' type='Attribution' visible='true'>
                        <b:includable id='main'>
            <b:if cond='data:feedbackSurveyLink'>
              <div class='mobile-survey-link' style='text-align: center;'>
                <data:feedbackSurveyLink/>
              </div>
            </b:if>

            <div class='widget-content' style='text-align: center;'>
              <b:if cond='data:attribution != &quot;&quot;'>
               <data:attribution/>
              </b:if>
            </div>

            <b:include name='quickedit'/>
          </b:includable>
    </b:widget>

  6. Delete and save your template. You are all done!

You have now successfully delete the blogger attribution gadget. It won't display on your blog now and neither will it eat up your page load time by rendering in background.

Need Help?

This post was requested by many of you, though there are many alternatives already online but this second method is the easiest and most effective of all. Let me know if you need any further help. Post your questions below. Your feedback means a lot. Good day! =)

Use Human Readable "Date Format" in Blog Posts

By

Change Date Format of Posts in BloggerThis is probably the most request posted on blogger Timestamp and Date header format. This simplest trick of converting date formats in Blogger blogs is thus first time shared online using Data Layout Tags. The date inside BlogSpot posts are displayed in the format "MM/DD/YYYY" which is a non-readable formatting for mentioning the publishing time and date of an article. If you see the date format in MBT posts (i.e. Nov 21, 2015) you will observe that the formatting is done in a more human readable and visual way where Month and Day are comma separated from Year ( i.e. Month Day, Year ). The month is written in short abbreviated way followed by day and then year. A reader gets a clear idea of when the post was published by looking at the date at a glance instead of getting confused with the Western and Asian Date formatting of "MM/DD/YYYY" and "DD/MM/YYYY" respectively. In this tutorial we will use the simple technique of replacing the Timestamp layout tag inside posts with Date Header tag. In our JSON Tutorial series we will discuss a more advanced JavaScript approach to better control the styling of each element in the date formatting.

Before:

non-readable Date format

After:

Readable Date Format

Change Blogger Date Formatting inside Blog Posts

Follow these easy steps:

1 Go to Blogger > Template > Backup your template

2 Click Edit HTML

3 Search for this layout tag

<data:post.timestamp/>

4 The above code will appear twice. Once for mobile view and once for desktop view. Replace it twice with this layout tag:

<i class='fa fa-clock-o'/><data:post.dateHeader/>

Note: The yellow highlighted code will show a clock Icon next to the date, if you don't want this FontAwesome icon then simply remove the yellow code.

5 Save your template and you are almost done!

6 Next go to Settings > Language and Formatting > Formatting

From the drop down menu next to the Date Header Format select the first option i.e. Nov 21, 2015:

Post Date Formatting in blogger

You can choose any formatting of your choice, the last two options are also good. In our case we chose the format: Nov 21, 2015

Date header formats

7 Click the "Save Settings" button and you are all done!

Need Help?

What we did was a simple solution to the existing problems faced with Post Date formatting. In our JSON tutorial we will adopt a JavaScript technique to give more advance control over the structure of Date. With that tutorial you will be able to style Month, Day and Year elements separately using CSS classes. The current solution is the easiest way for non-techy users. I hope this helps most in better displaying the Publish Timestamp on their blog posts. Do ask me any question you may have.

Peace and blessings buddies :)

Auto Update Credits Info in Template Footer

By

autoupdate credits info in template footerIt makes a lot of sense to always add your website name along with Copyrights Date/time in Footer credits to let your users get accustomed to your brand identity and also know that you reserve full copyrights of the content you share on your blog. A credit link consists of mostly your Trademark/benchmark name (i.e. Blog Title) and the Time interval for which you deserve full ownership of your Blog resources and of its use and distribution. When we design Blogger templates we often add Credit links or attribution links at the bottom of the blog footer to let everyone know who designed and developed the template.

In your case if you want to remind your visitors of who owns the content and resources then you can surely use the simple script shared below which will dynamically insert your Blog Title, Blog link and current Year in your blog to let everyone know of your Copyrights. After using this XHTML + JavaScript, no matter how many years may pass by, your footer credits will always show the current Copyrights Legal Date, thus preventing you from manually updating the Date each year and Blog Title each time you update the Site Title. If it is 2015 it will show � 2015 and in 2020 it will automatically get updated to � 2020. Therefore this tutorial will help you Auto Insert Copyrights Legal Date and Trademark in Blogger Footer Credits. Lets get started

Update Blogger footer Credits

1 Go To Blogger > Template > Backup your Template

2 Click Edit HTML

3 Search your Footer Credits code and replace the contents with this Simple code.

INPUT:

<a expr:href='data:blog.homepageUrl'><data:blog.title/>� </a> <script type='text/javascript'>document.write(new Date().getFullYear());</script>, All Rights Reserved.

OUPUT:

My Blogger Tricks� � 2015, All Rights Reserved.

Things to note:

  • data:blog.homepageUrl will be replaced with your Blog Homepage URL
  • <data:blog.title/>� will be replaced with your Homepage title i.e. Your Trademark
  • The green highlighted script will be replaced with Current new Date of the year. getFullYear() returns the year in four digits. You can learn more about it at JavaScript Date Reference
  • You can replace the bold black text with any custom message you may like

4 Finally save your template!

Your Footer will now be automatically updated each time you change your blogspot blog title or when the new year arrives!

Need Help?

Let me know if you needed any help with this simple XHMTL trick that uses Blogger layout tags and some simple JavaScript. Wish you great weekend buddies. Have fun with friends and family. Peace buddies! =)
